Share
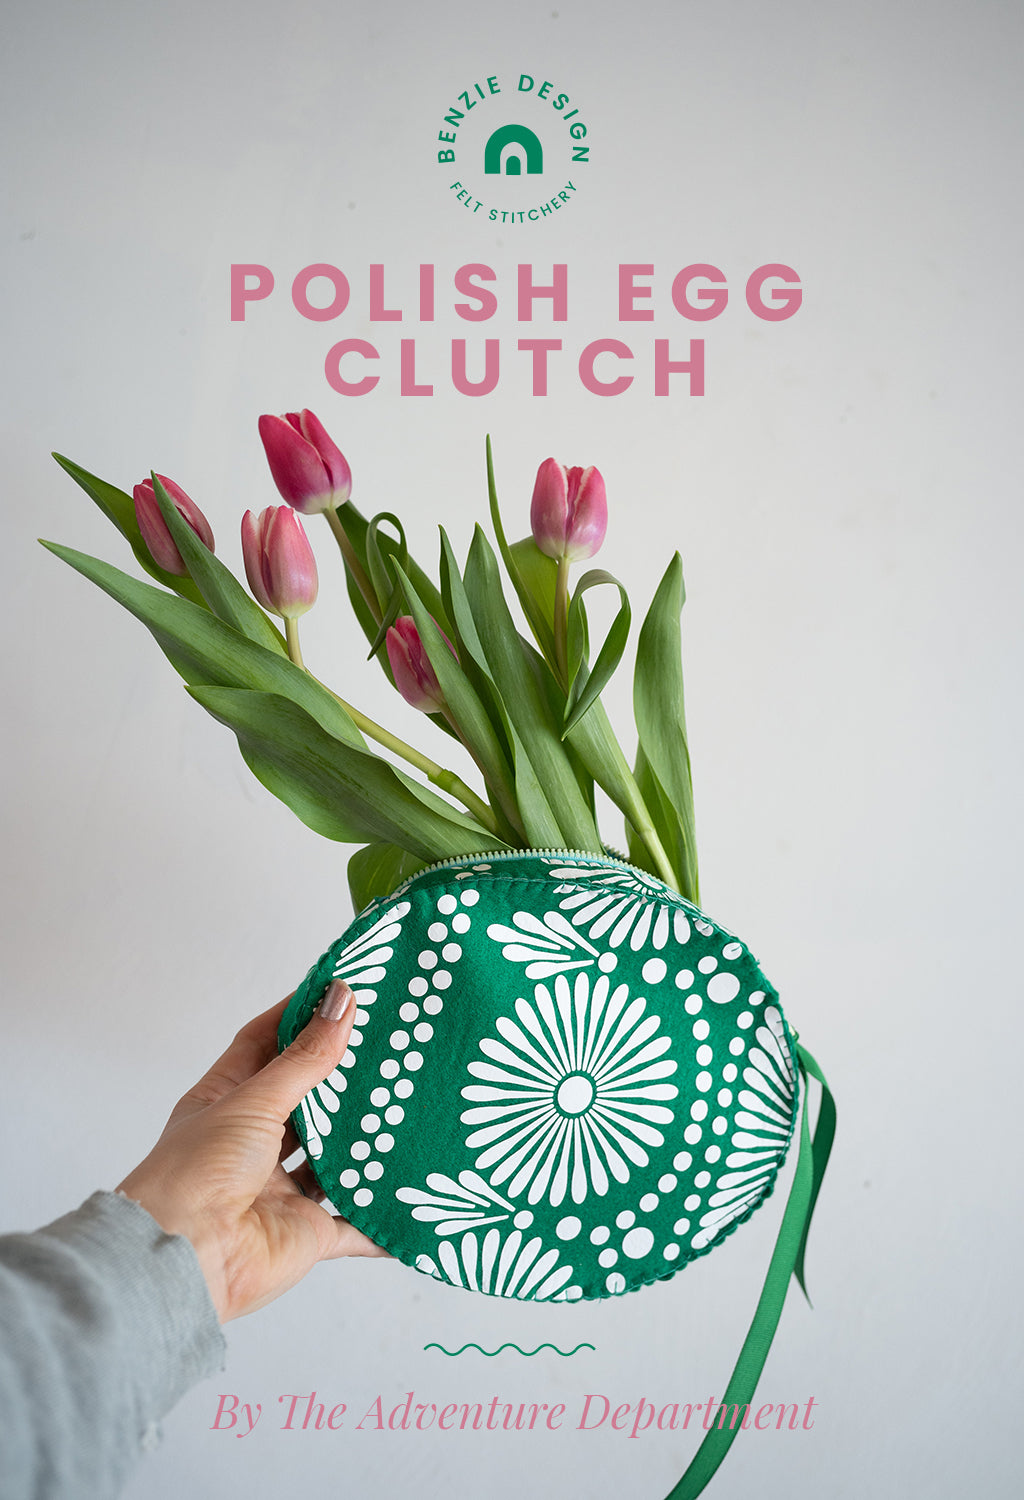
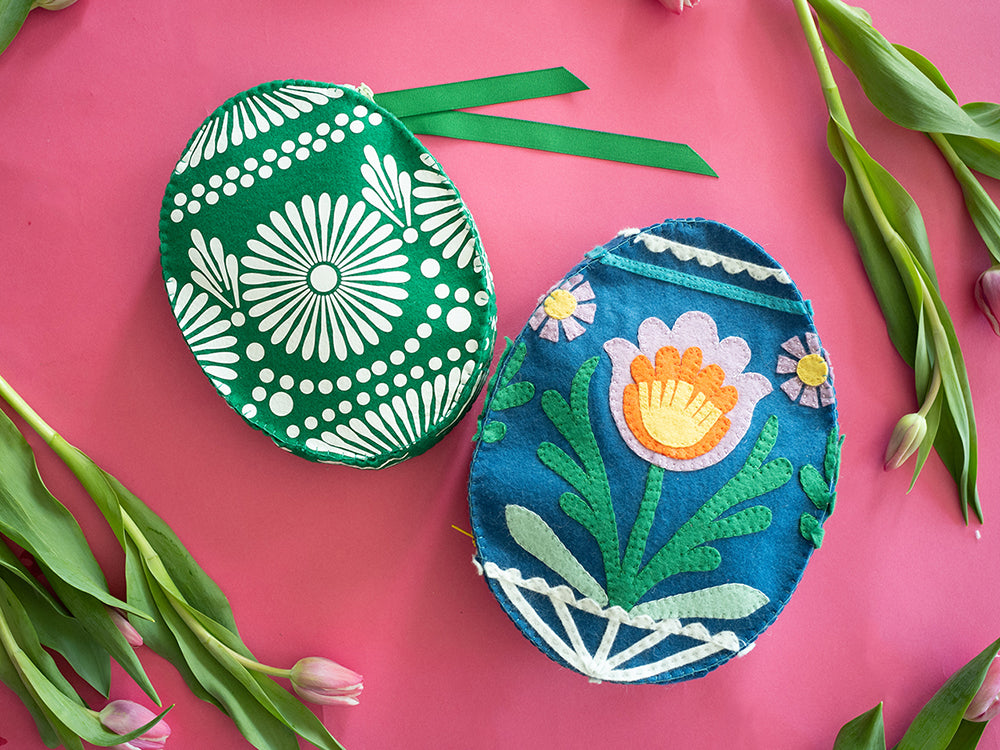
Holidays look different all over the world, so we are always delighted to share traditions specific to our Benzie Design Maker Team. Today Kasia of @theadventuredept is sharing her portable version of a Polish Easter egg. This egg clutch is sure to be the star of your Easter ensemble!
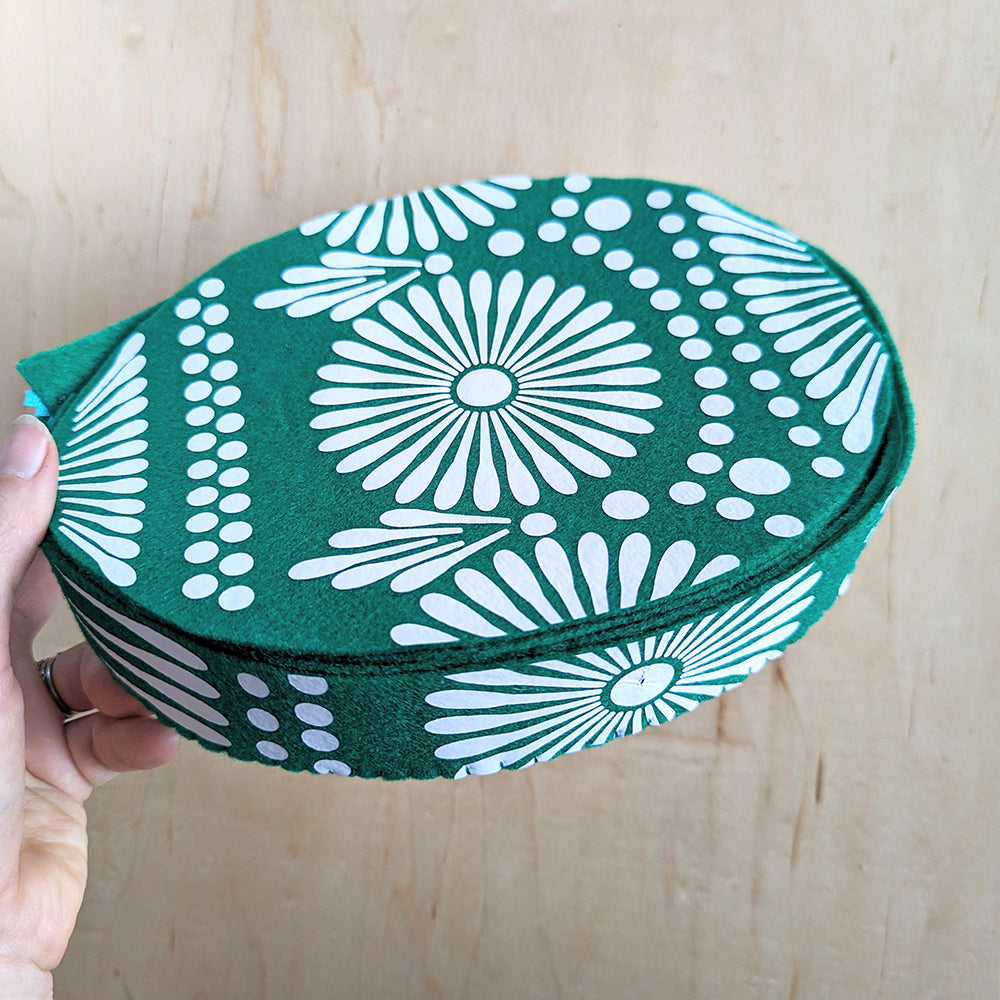
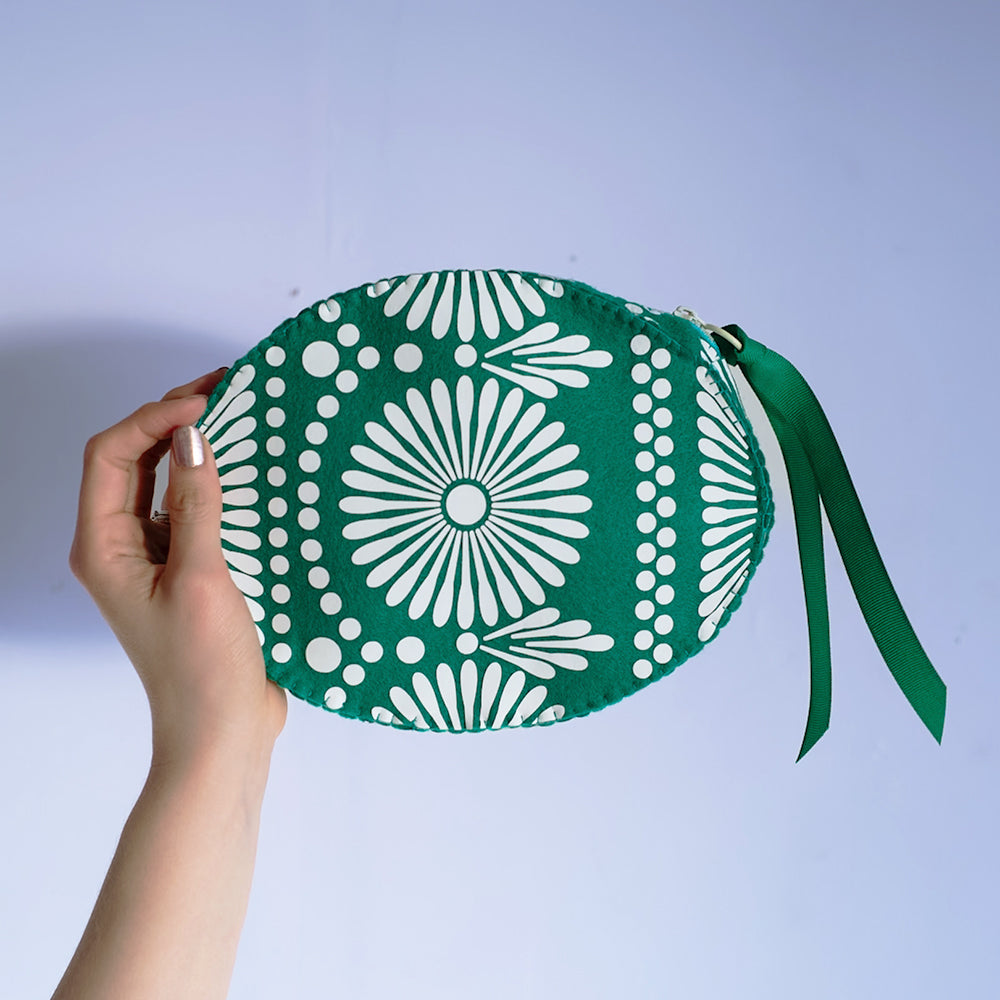
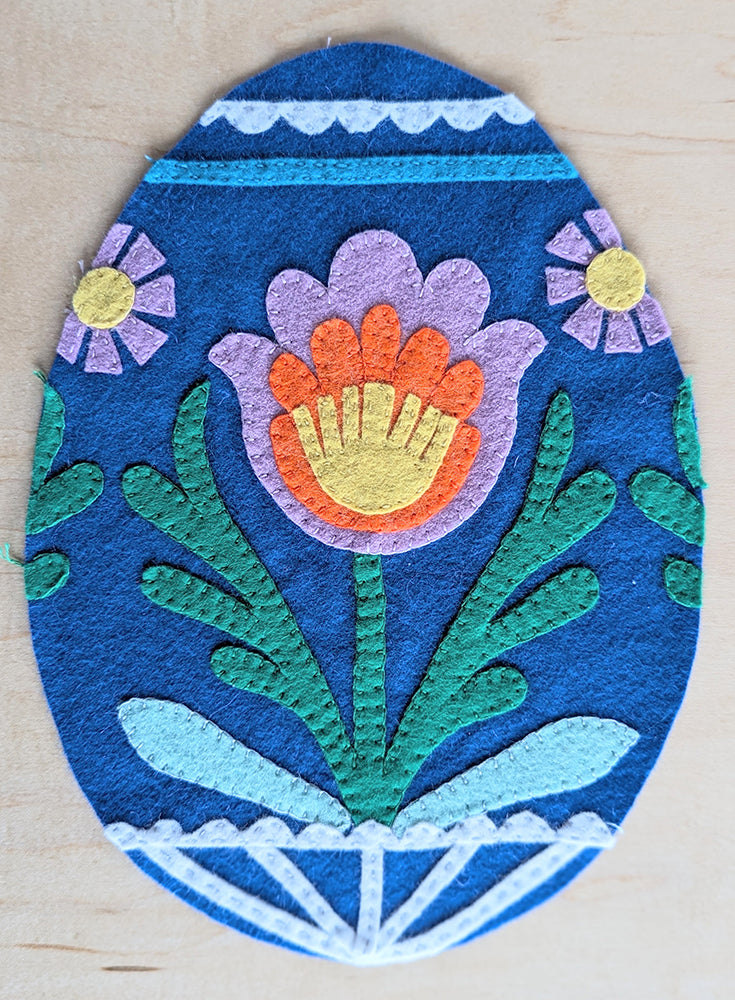
Besides bestowing upon me a name that has left 35 years-worth of teachers, doctors and telemarketers scratching their heads, my family didn’t really lean into our Polish heritage all that much when I was growing up. Every Easter, though, my sisters and I fawned over the bowl of beautiful, intricate eggs - pisanki - that appeared in the dining room. Pisanki are made utilizing layers of wax resist and dye, but many other types of egg decoration are also common throughout Poland. Here, I’ve adapted two styles, Pisanki and Nalepianki (a cut-paper style that translates beautifully to felt applique), into extremely cute zipper pouches. They’re the perfect final touch to an Easter brunch look or an ideal hiding spot for your secret stash of chocolate mini eggs.
Skill Level: Intermediate
Time: 2-3 hours for Pisanki, 3-6 hours for Nalepianki
Additional Supplies:
Egg Patterns and Placement Guide (click to download)
Pisanki Cutting File (click to download)*
One 8” Zipper, for Pisanki
One 10” Zipper, for Nalepianki
Iron
Cutting mat
Cutting Machine, for Pisanki*
12 x 24" sheet of White heat transfer vinyl, for Pisanki*
*If you don’t have access to a cutting machine, use a paint pen to draw the design on the Pisanki clutch.
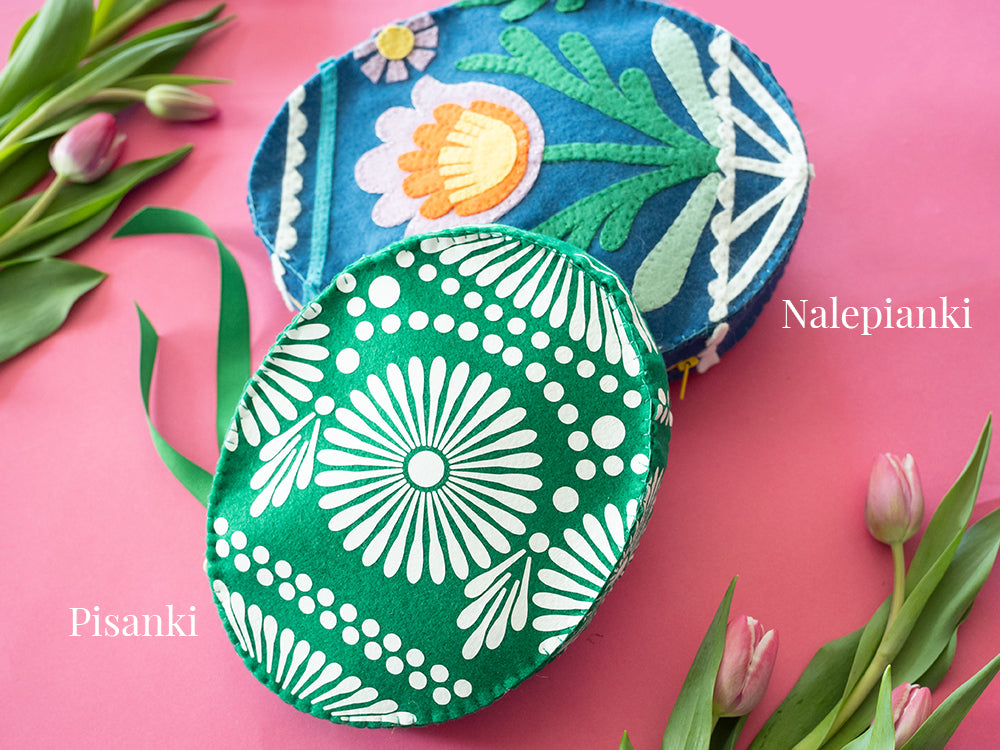
CLASSIC PISANKI CLUTCH - Finished bag measures 8.75 x 6.75”
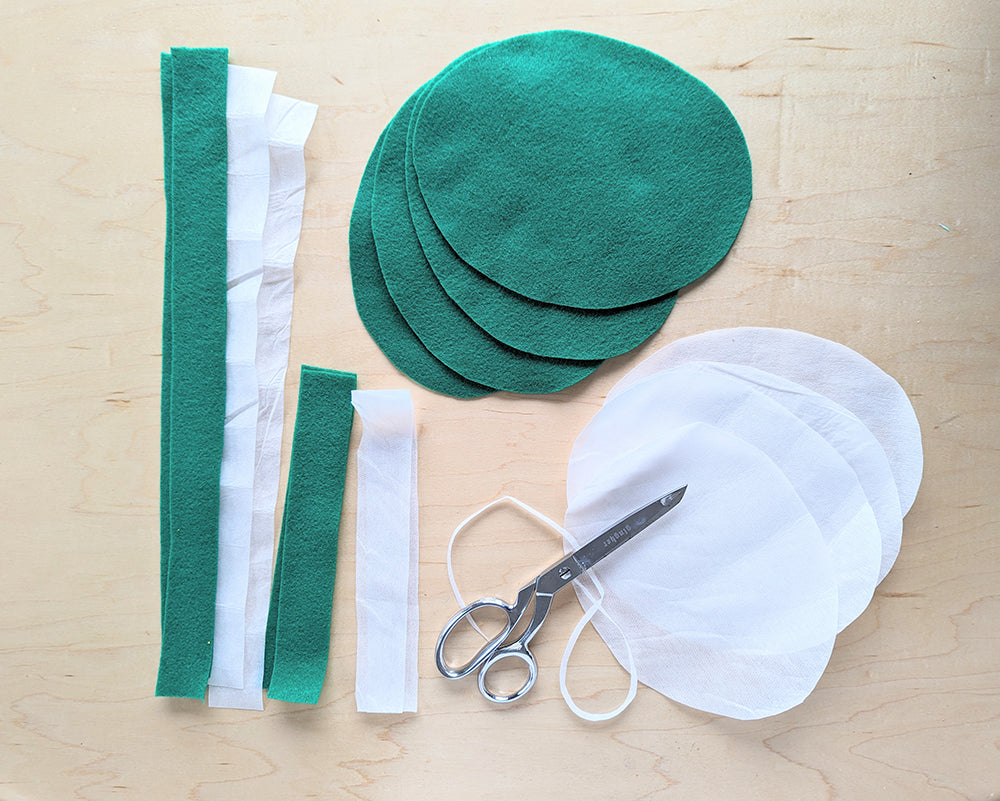
1. Cut felt and fusible interfacing:
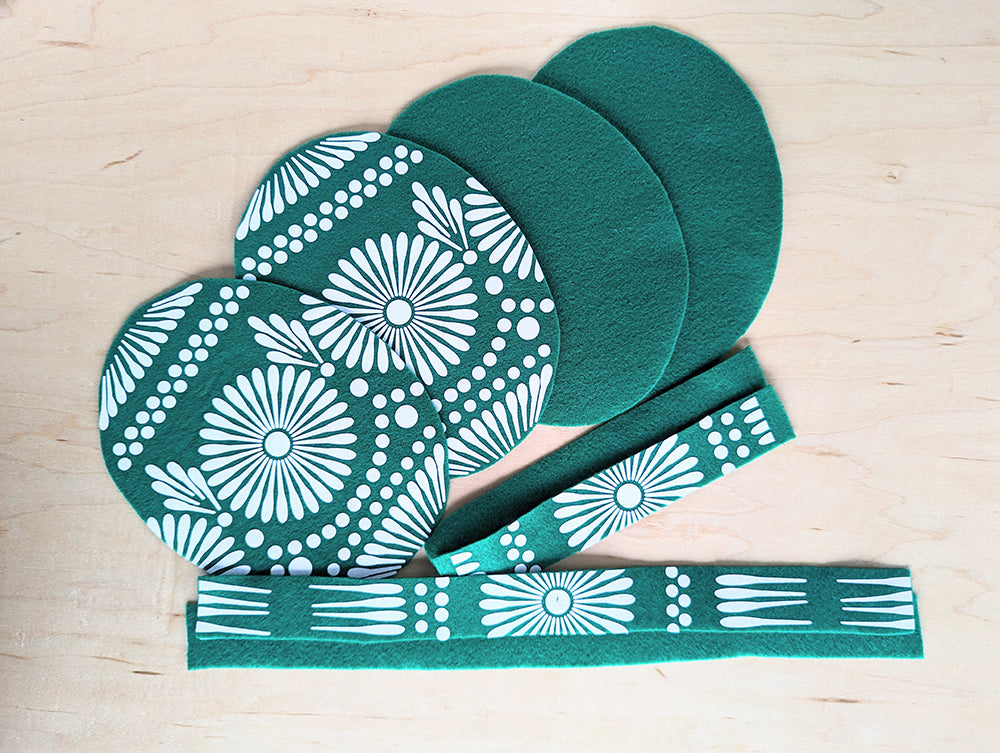
Emerald Felt - 4 Eggs, 2 Long Strips, 2 Short Strips
Interfacing - 4 Eggs, 2 Long Strips, 2 Short Strips
Mark the center point on the long edges of the long strips. Please note that the measurements for the strips are listed on the pattern.
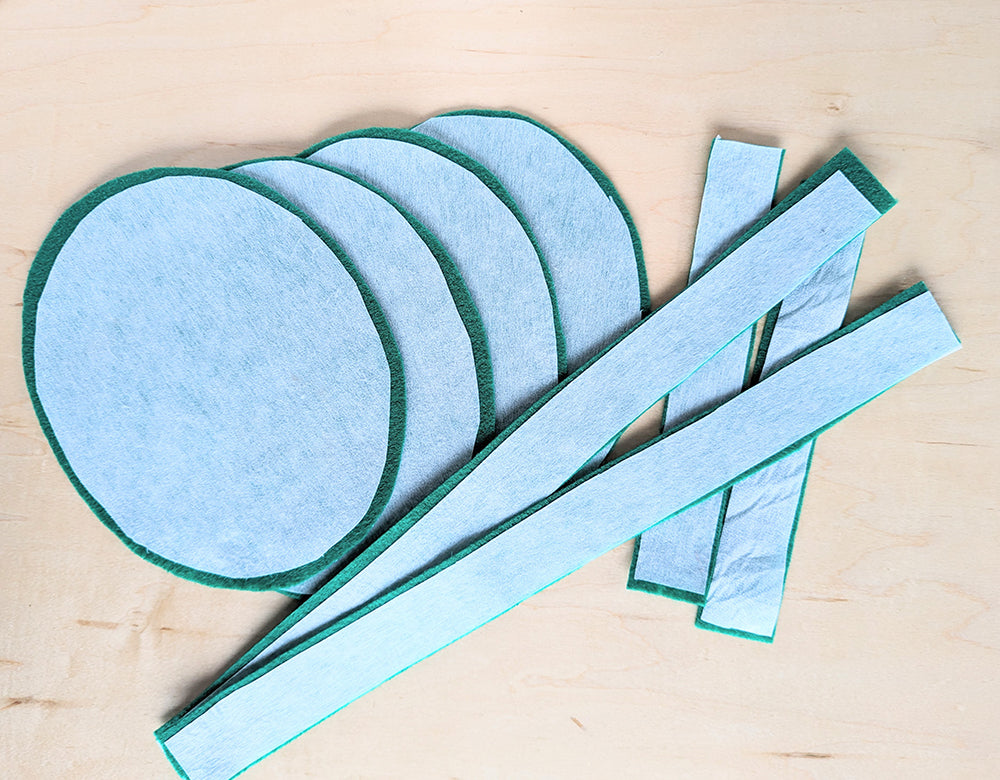
2. Trim about ⅛” off all edges of the interfacing pieces. This will allow interfacing to fit neatly within the margins of the shape without adding extra bulk to the edge stitching that will follow.
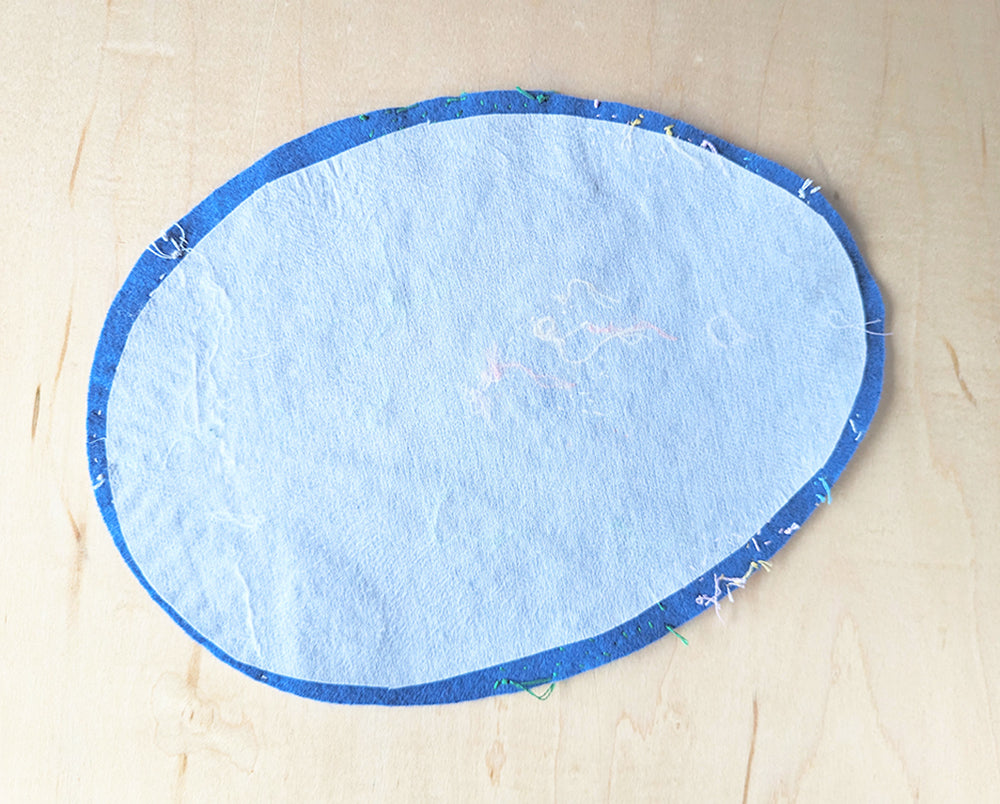
3. Apply interfacing to the wrong side of all pieces. Set aside.
4. Cut decoration from White heat transfer vinyl using the attached SVG file and a cutting machine. Weed.
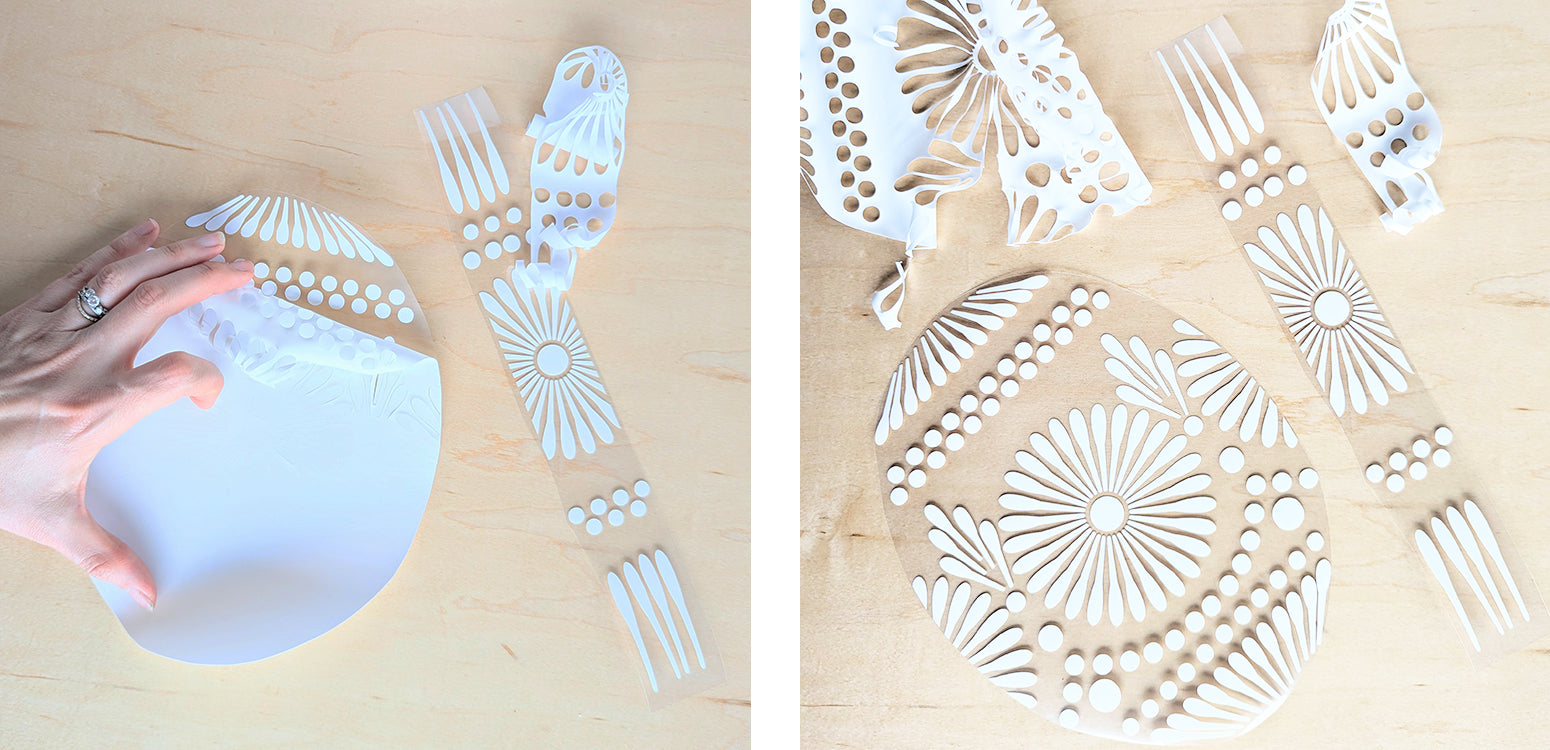
5. Carefully line up the weeded vinyl with the corresponding base pieces. You have cutwork for two Egg pieces, one shorter rectangle and one longer rectangle. Apply to the side opposite the interfacing with an iron or heat press, following manufacturer’s instructions for time and temperature.
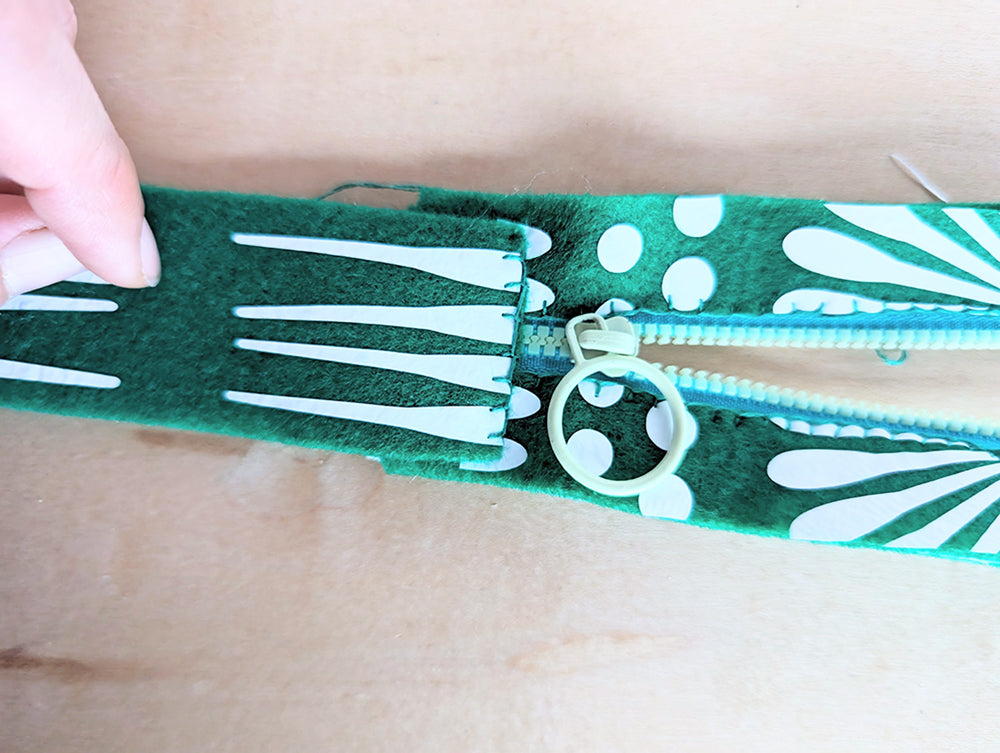
6. Using a rotary blade, cut the two shorter rectangle pieces in half lengthwise so you have four skinny strips - two embellished, two plain. Sandwich one side of the zipper tape between one embellished and one plain strip (wrong sides together) with the felt edge about ⅛” from the teeth.
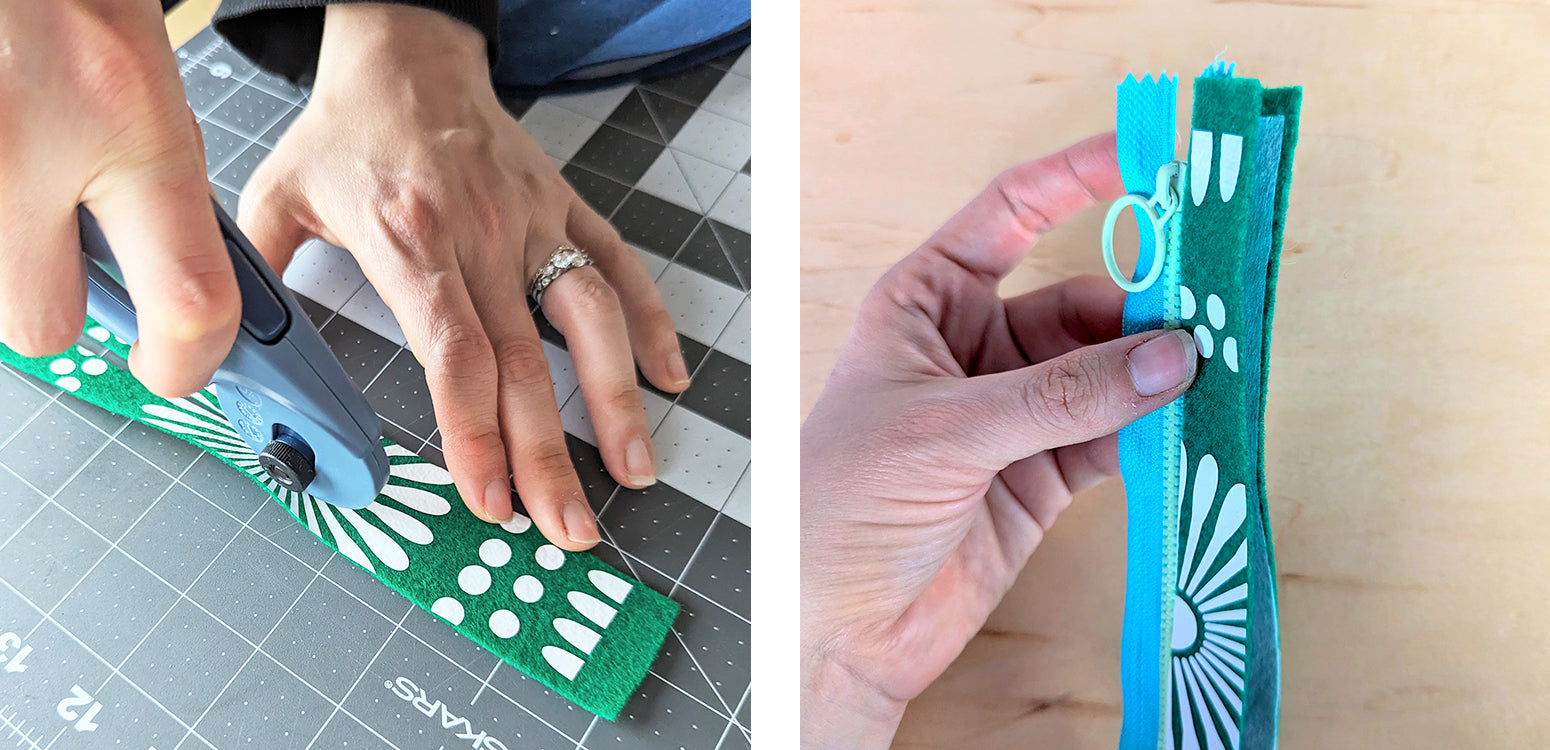
7. Blanket stitch along the edge of the felt making sure to catch both layers of felt and the zipper tape. Repeat for the second side of the zipper.
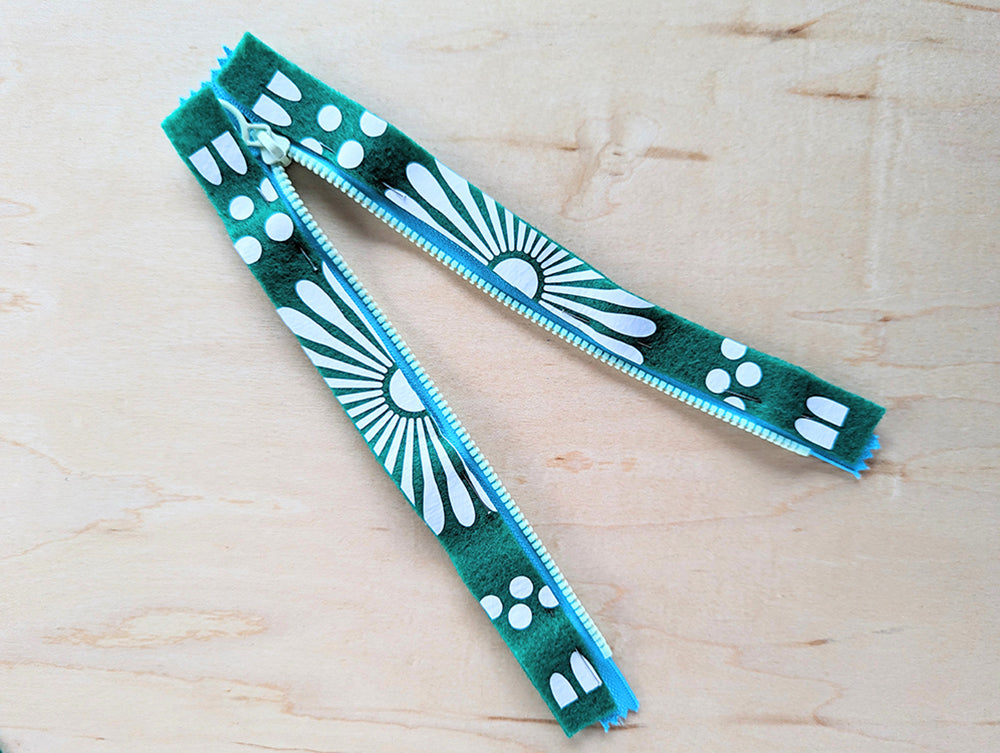
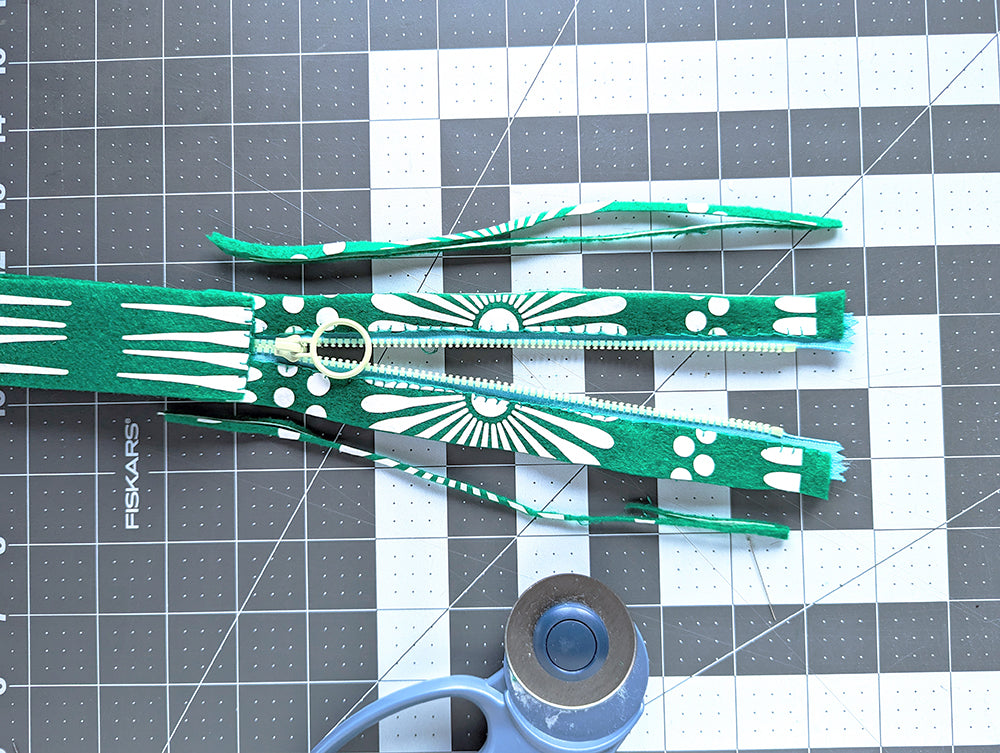
8. With the open ends of the zipper tape kissing, sandwich the bottom end of the zipper between the two longer rectangle pieces. Blanket stitch, being sure to catch all layers.
9. Using the rotary cutter, trim the edges so the width of the entire strip is consistent. You will probably remove a little over ⅛” from each side of the shorter rectangles.
10. With right sides facing out, pair one embellished egg with one plain egg. Using a blanket stitch, sew the long strip perpendicular to the edge of the egg, lining up the zipper with the pattern notches and taking care to catch all four layers - both egg layers and both strip layers.
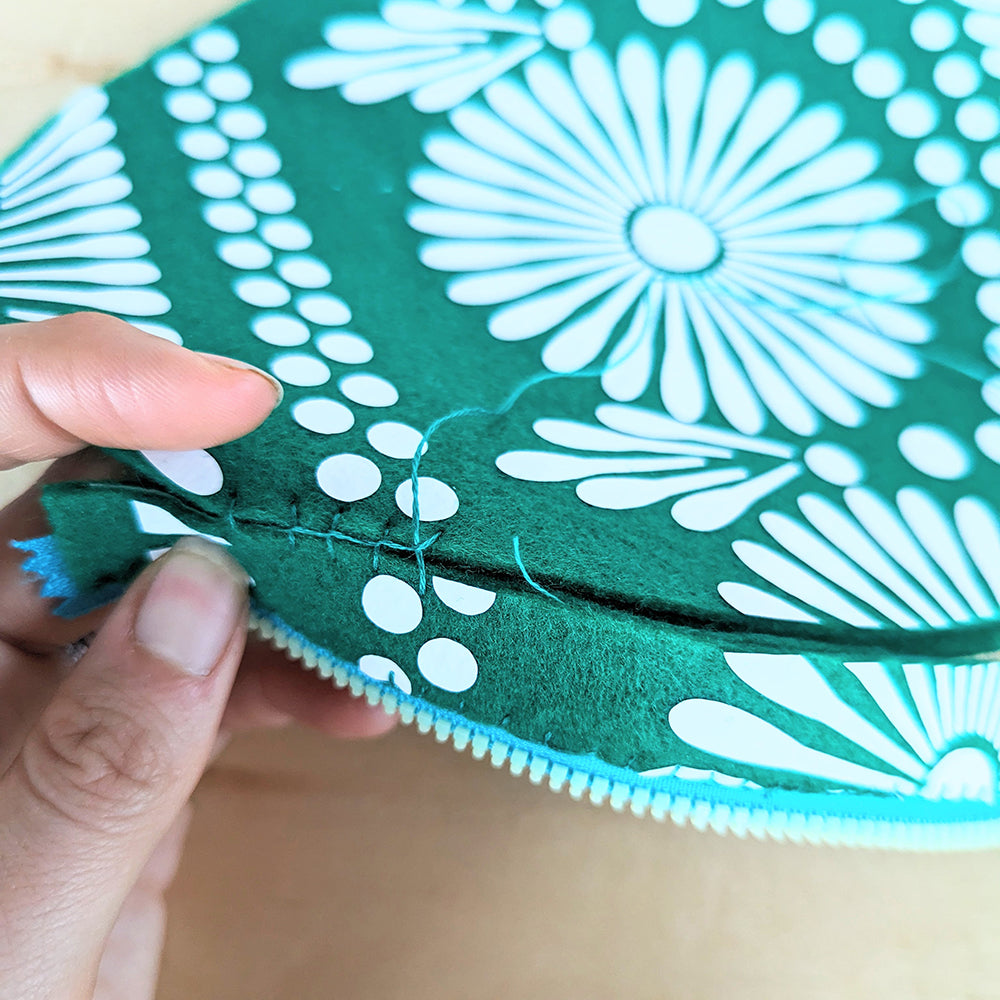
11. When you reach the edge of the strip, you should ideally find yourself right at the base of the zipper. The inside strip will be a little longer than the outside strip. Trim so both are flush and sit just over the zipper stop.

12. Blanket stitch the strip across the zipper tape in the same manner as before.
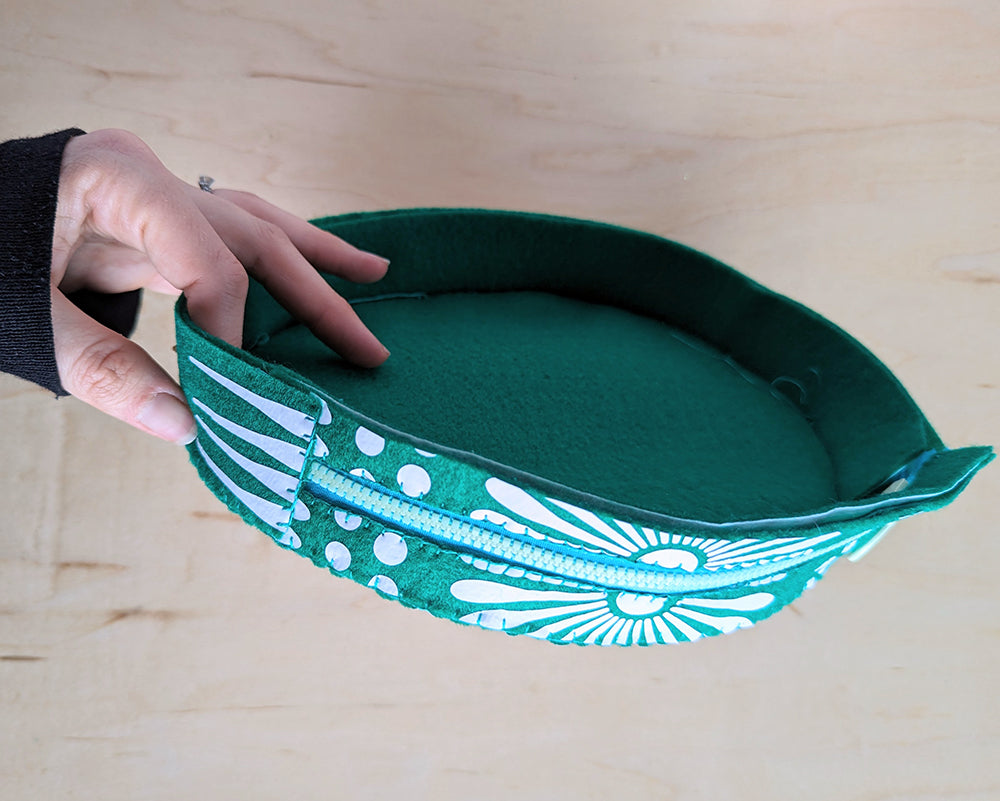
13. Repeat with the final set of egg shapes to complete the clutch.
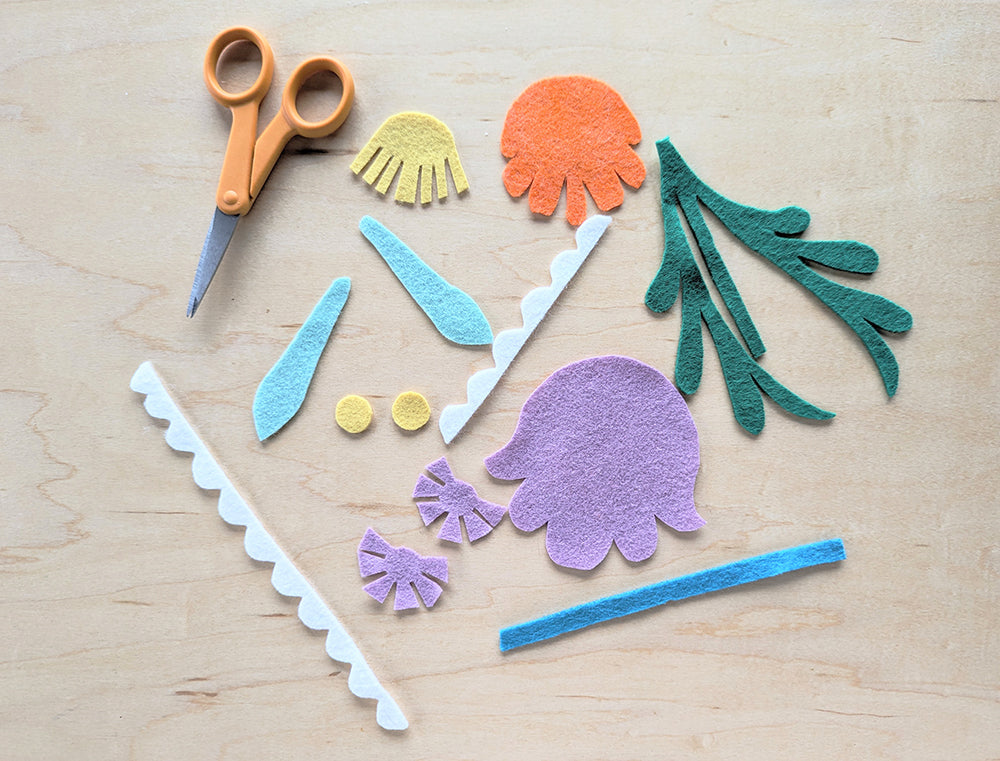
Nalepianki Clutch - Finished bag measures 8 x 10"
1. Cut felt and fusible interfacing:
Marine Felt - 4 Eggs, 2 Long Strips, 2 Short Strips
Interfacing - 4 Eggs, 2 Long Strips, 2 Short Strips
Note that the Nalepianki version is a larger clutch than the Pisanki! Mark the center point on the long edges of the long strips.
2. Trim about ⅛” off all edges of the interfacing pieces. This will allow the interfacing to fit neatly within the margins of the shape without adding extra bulk to the edge stitching that will follow.
3. Cut the decorations from specified colors of felt using fine-detail scissors.
4. Following the placement chart, arrange and stitch embellishment using blanket stitches and/or running stitches in matching embroidery floss. I like to lightly attach appliques to the base fabric using tiny dabs of hot glue or fabric glue prior to stitching to hold in place.
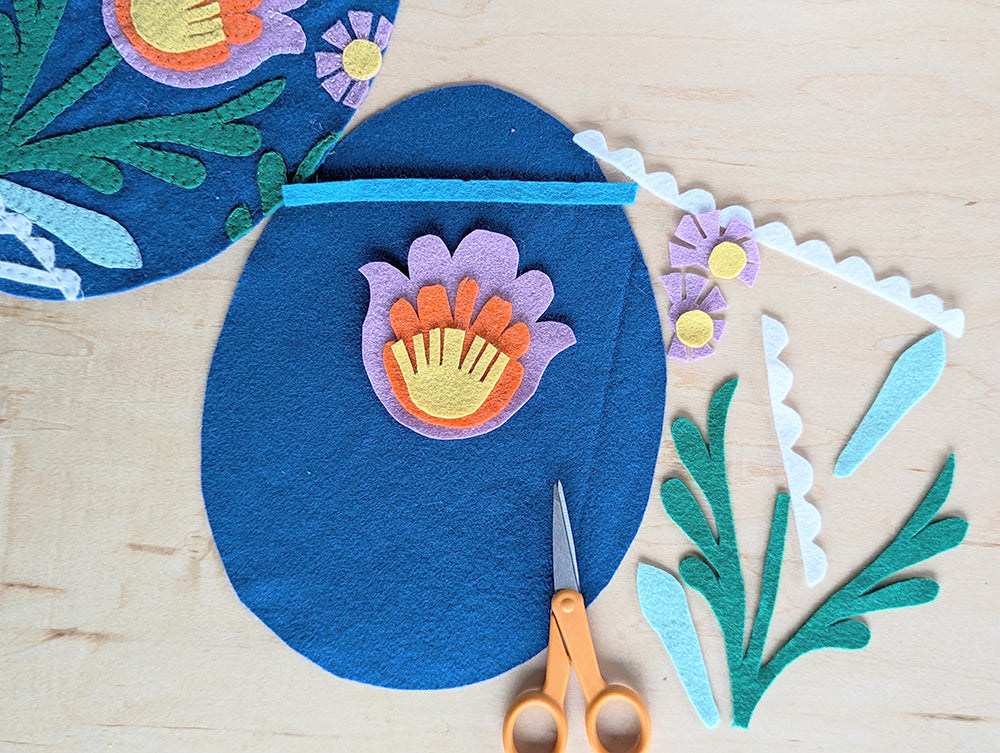
5. Apply decoration to two of the egg shaped pieces, one long strip and one short strip. Check the alignment of the motif on the strips against the motifs of the eggs and make any adjustments before permanently stitching.
If you are pressed for time, you can fully glue or fuse your appliques and skip the hand stitching.
6. When all decoration is applied, apply fusible interfacing to the wrong side of all base pieces, including unembellished pieces. Doing this step after stitching locks any loose thread ends into place and lends a bit more stability to the embroidery.
7. Follow Steps 6-13 for the Pisanki clutch above to attach the zipper and finish the Nalepianki clutch.
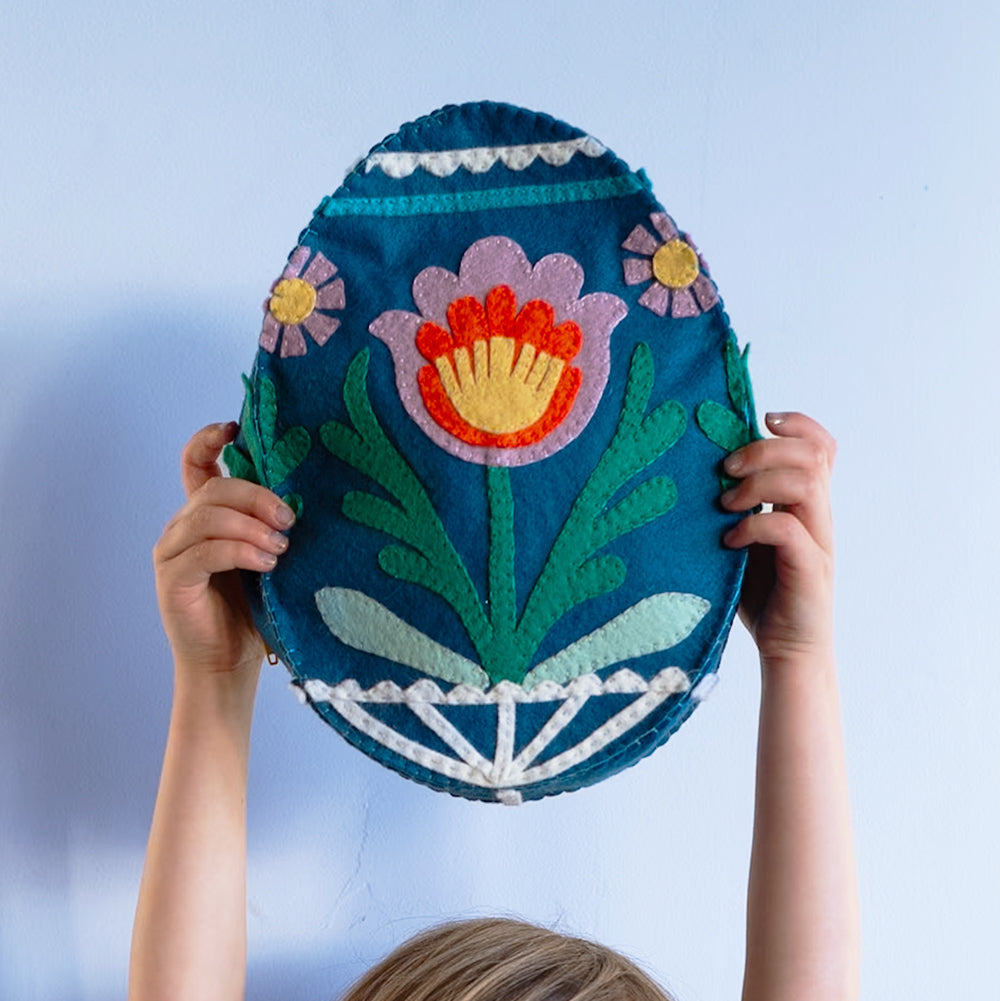
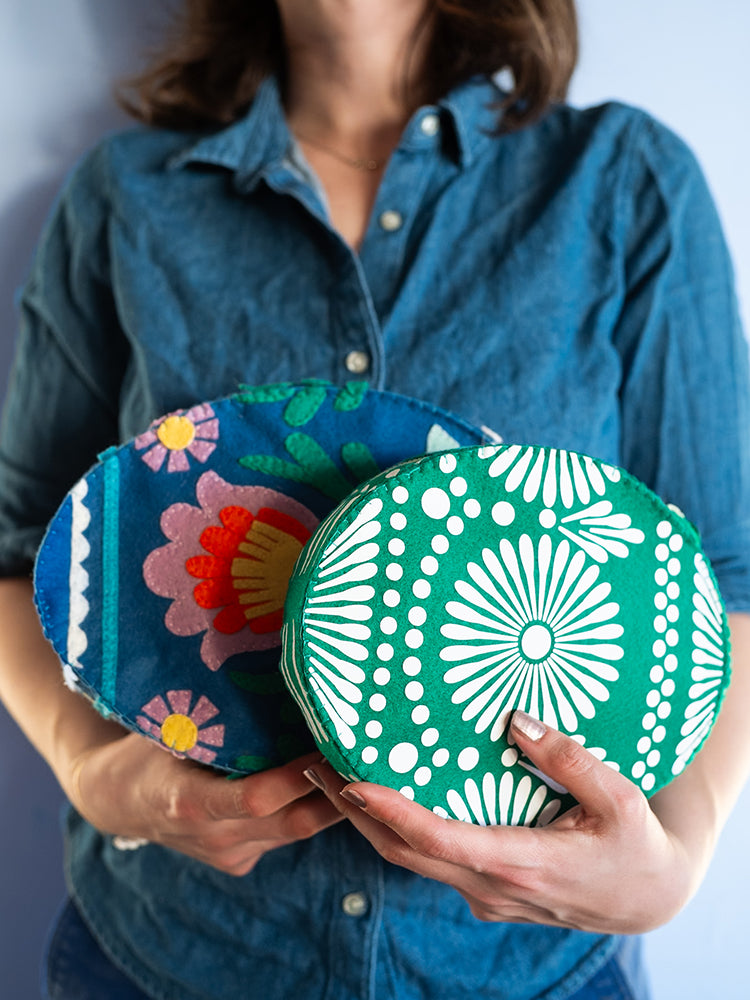
As usual, there are endless ways to make this your own. Change up the color combinations, play with the scale, add a strap to make a crossbody or adapt the pattern to reflect your own egg-decorating tradition. What treasures will you store in yours?
Wesołego Jajka! (A Polish Easter greeting that translates to: Happy Egg!)
Thanks to Kasia for designing and writing this tutorial! You can see more of her work on Instagram @theadventuredept. Stay tuned for more tutorials from the Benzie Design Maker Team!


